Tehcnical expertise driving excellence.
Introduction to capable tolerancing
We often want to restrict the control of the performance of a product to the reduction of the tolerances of the functional parameters to limit the dispersion of the operational suitability condition.
This phenomenon is accentuated by the requirement of CAD, which needs nominals as soon as possible to be able to model the geometry in space.
In reality, you have to get out of this paradigm and understand the Tolerance Interval / Nominal relationship of the dimensions with the targets of the Functional Conditions. This is essential to control its design, costs and deadlines.
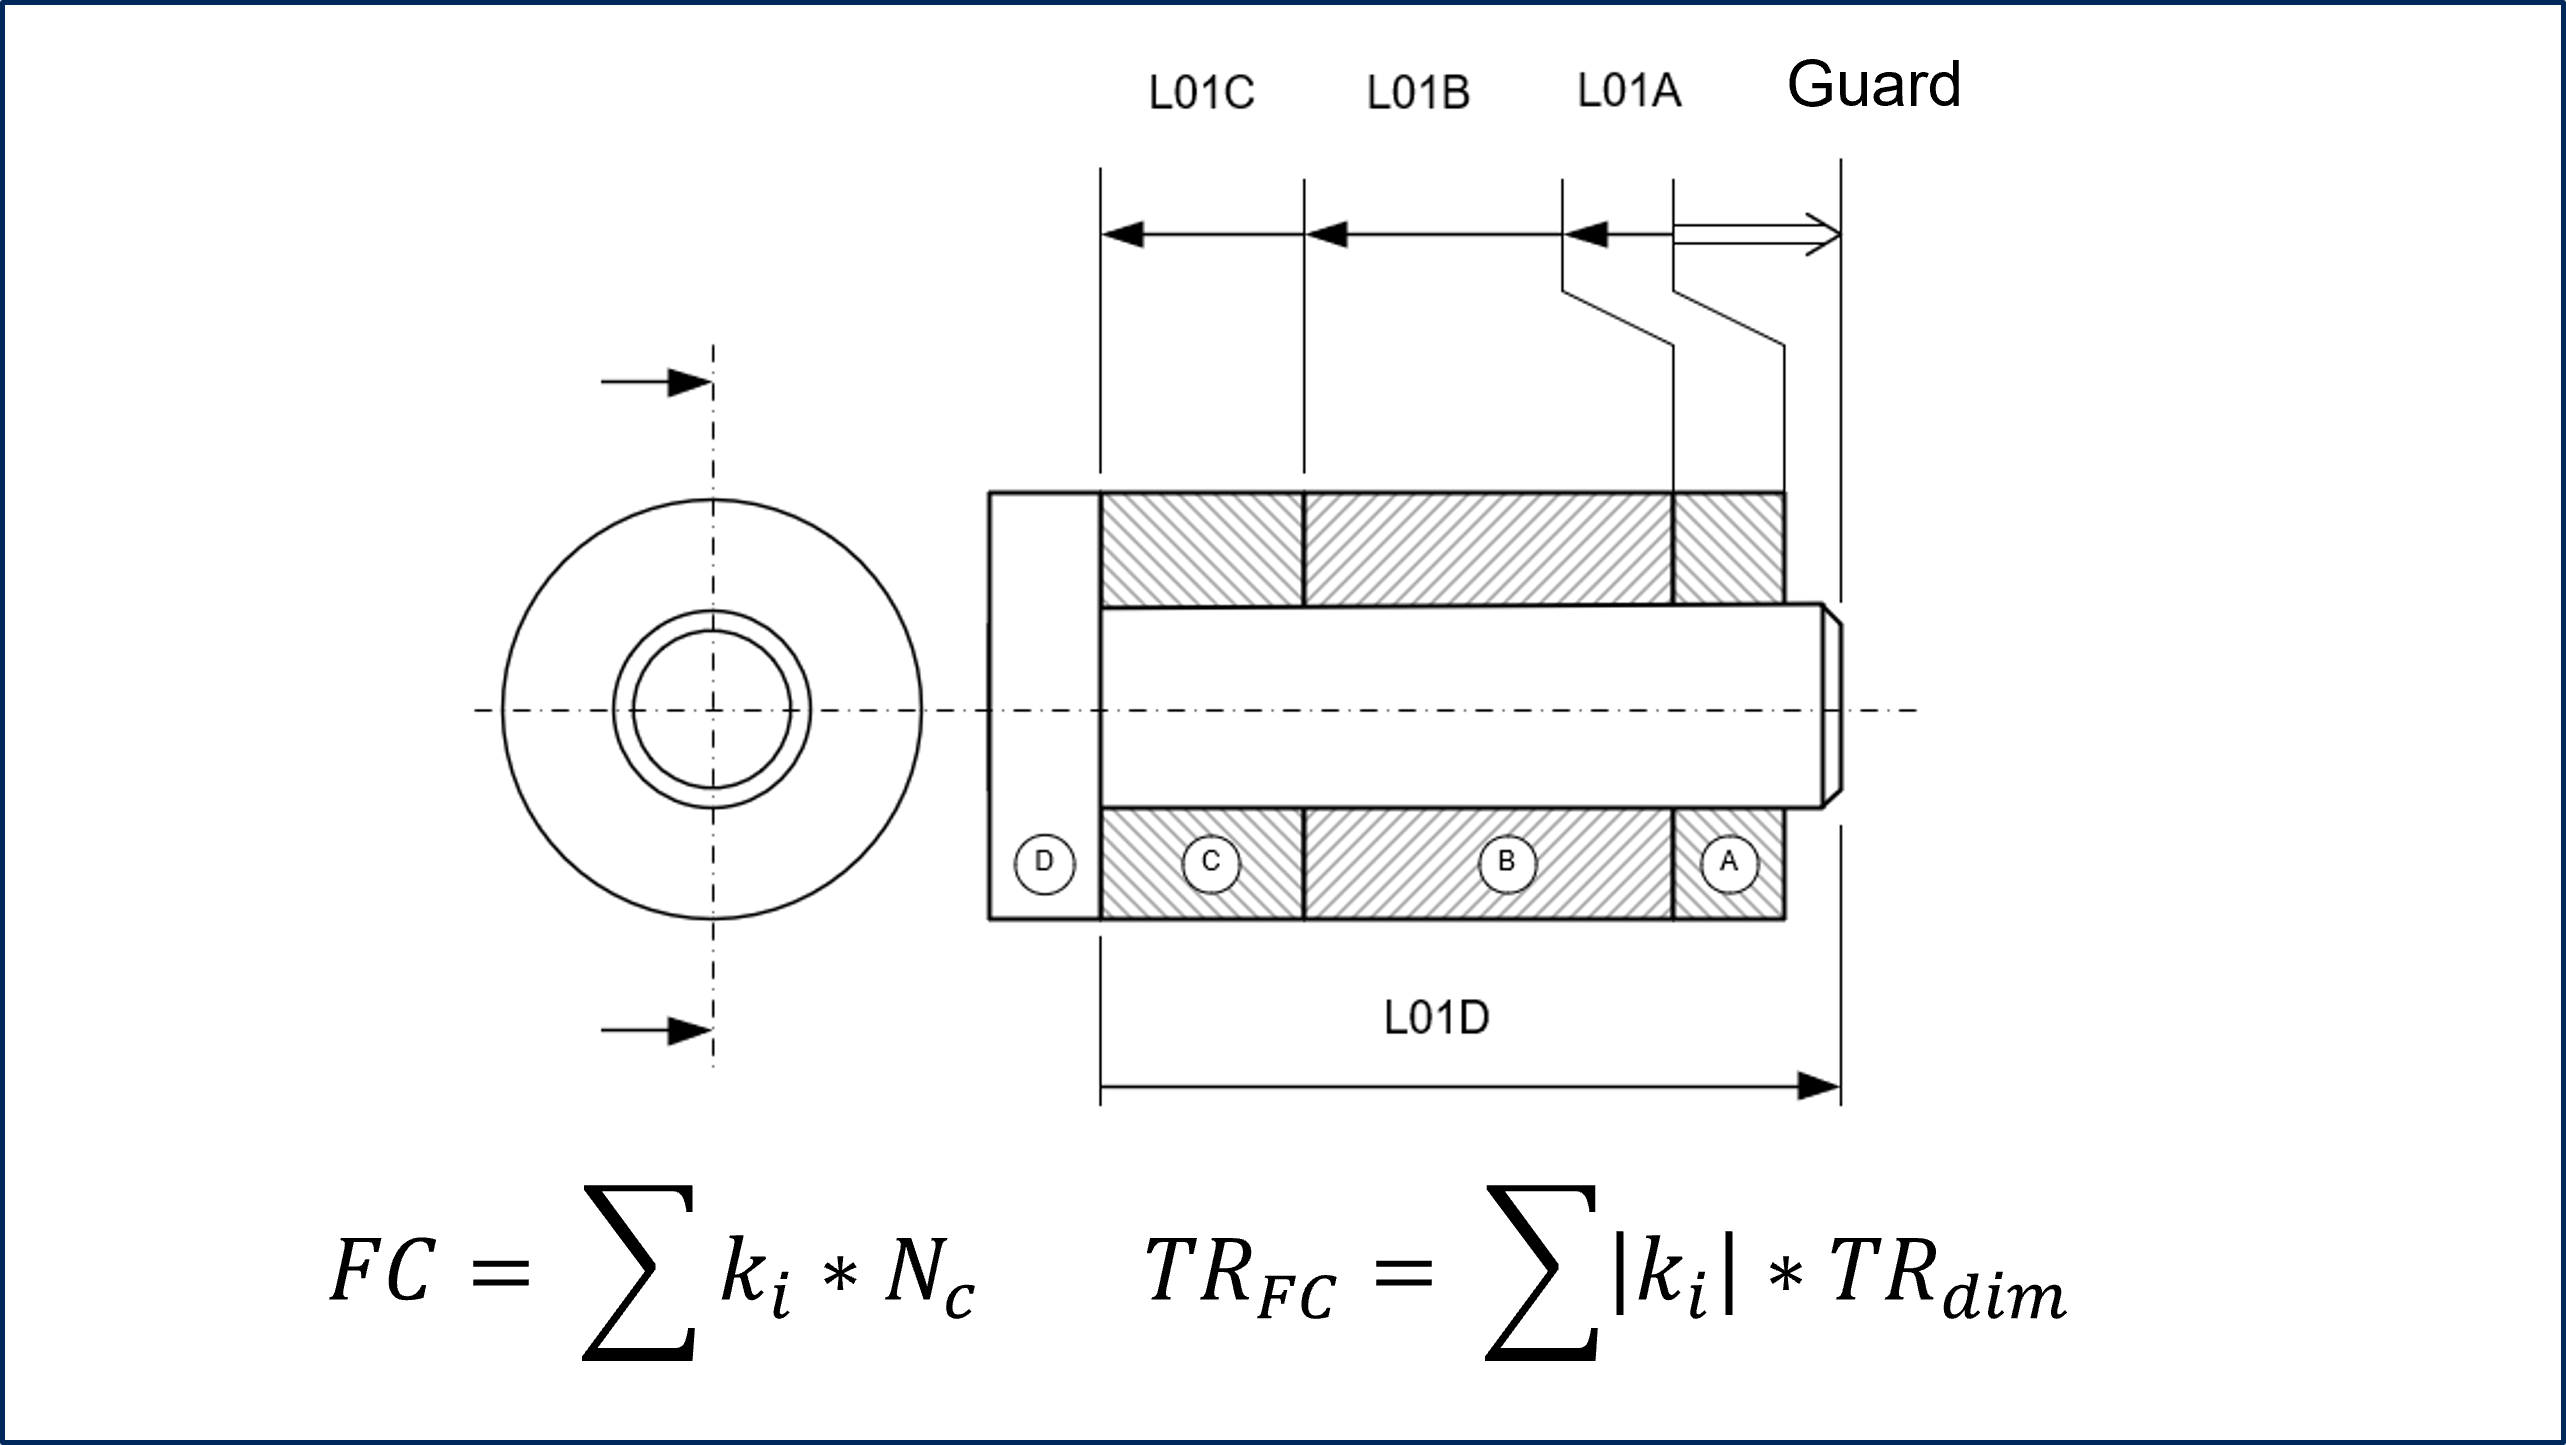
Consider a simple example of stacking parts on a shaft in worst-case called Guard.
The functional condition is calculated as a chain of vector dimensions in which ki represents the sensitivity or the partial derivative (ΔL/L) of the functional parameter for the condition.
The dispersion of the assembly is defined in linear as being the sum of the tolerance intervals of the functional parameters.
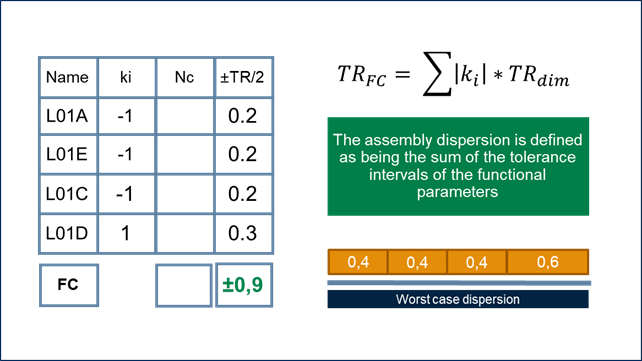
In the absence of functional targets, it is still possible to calculate the dispersion of the condition.
The Tolerance Interval is therefore 1.8 mm.
The graph represents the extent of the Tolerance Range (TR).
To reduce this dispersion, if you do not use statistics in your design, qualification and production process, only the reduction of the TR is possible, which will result in an increase on the cost of the part.
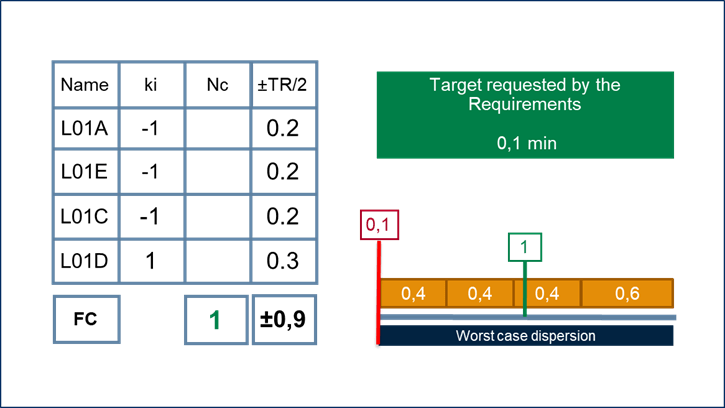
This overrun condition is associated with a dimensional requirement defined by the functional specifications which guarantees the performance of the assembly when the overrun is greater than 0.1mm.
So let’s take this target into account in our analysis.
The implementation of this unilimit target makes it possible to determine the minimum target (average) value to be achieved in order to comply with the requirements.
It corresponds to the min target plus half of the assembly tolerance.
TargetMin= 0.1 + 0.9 = 1 mm
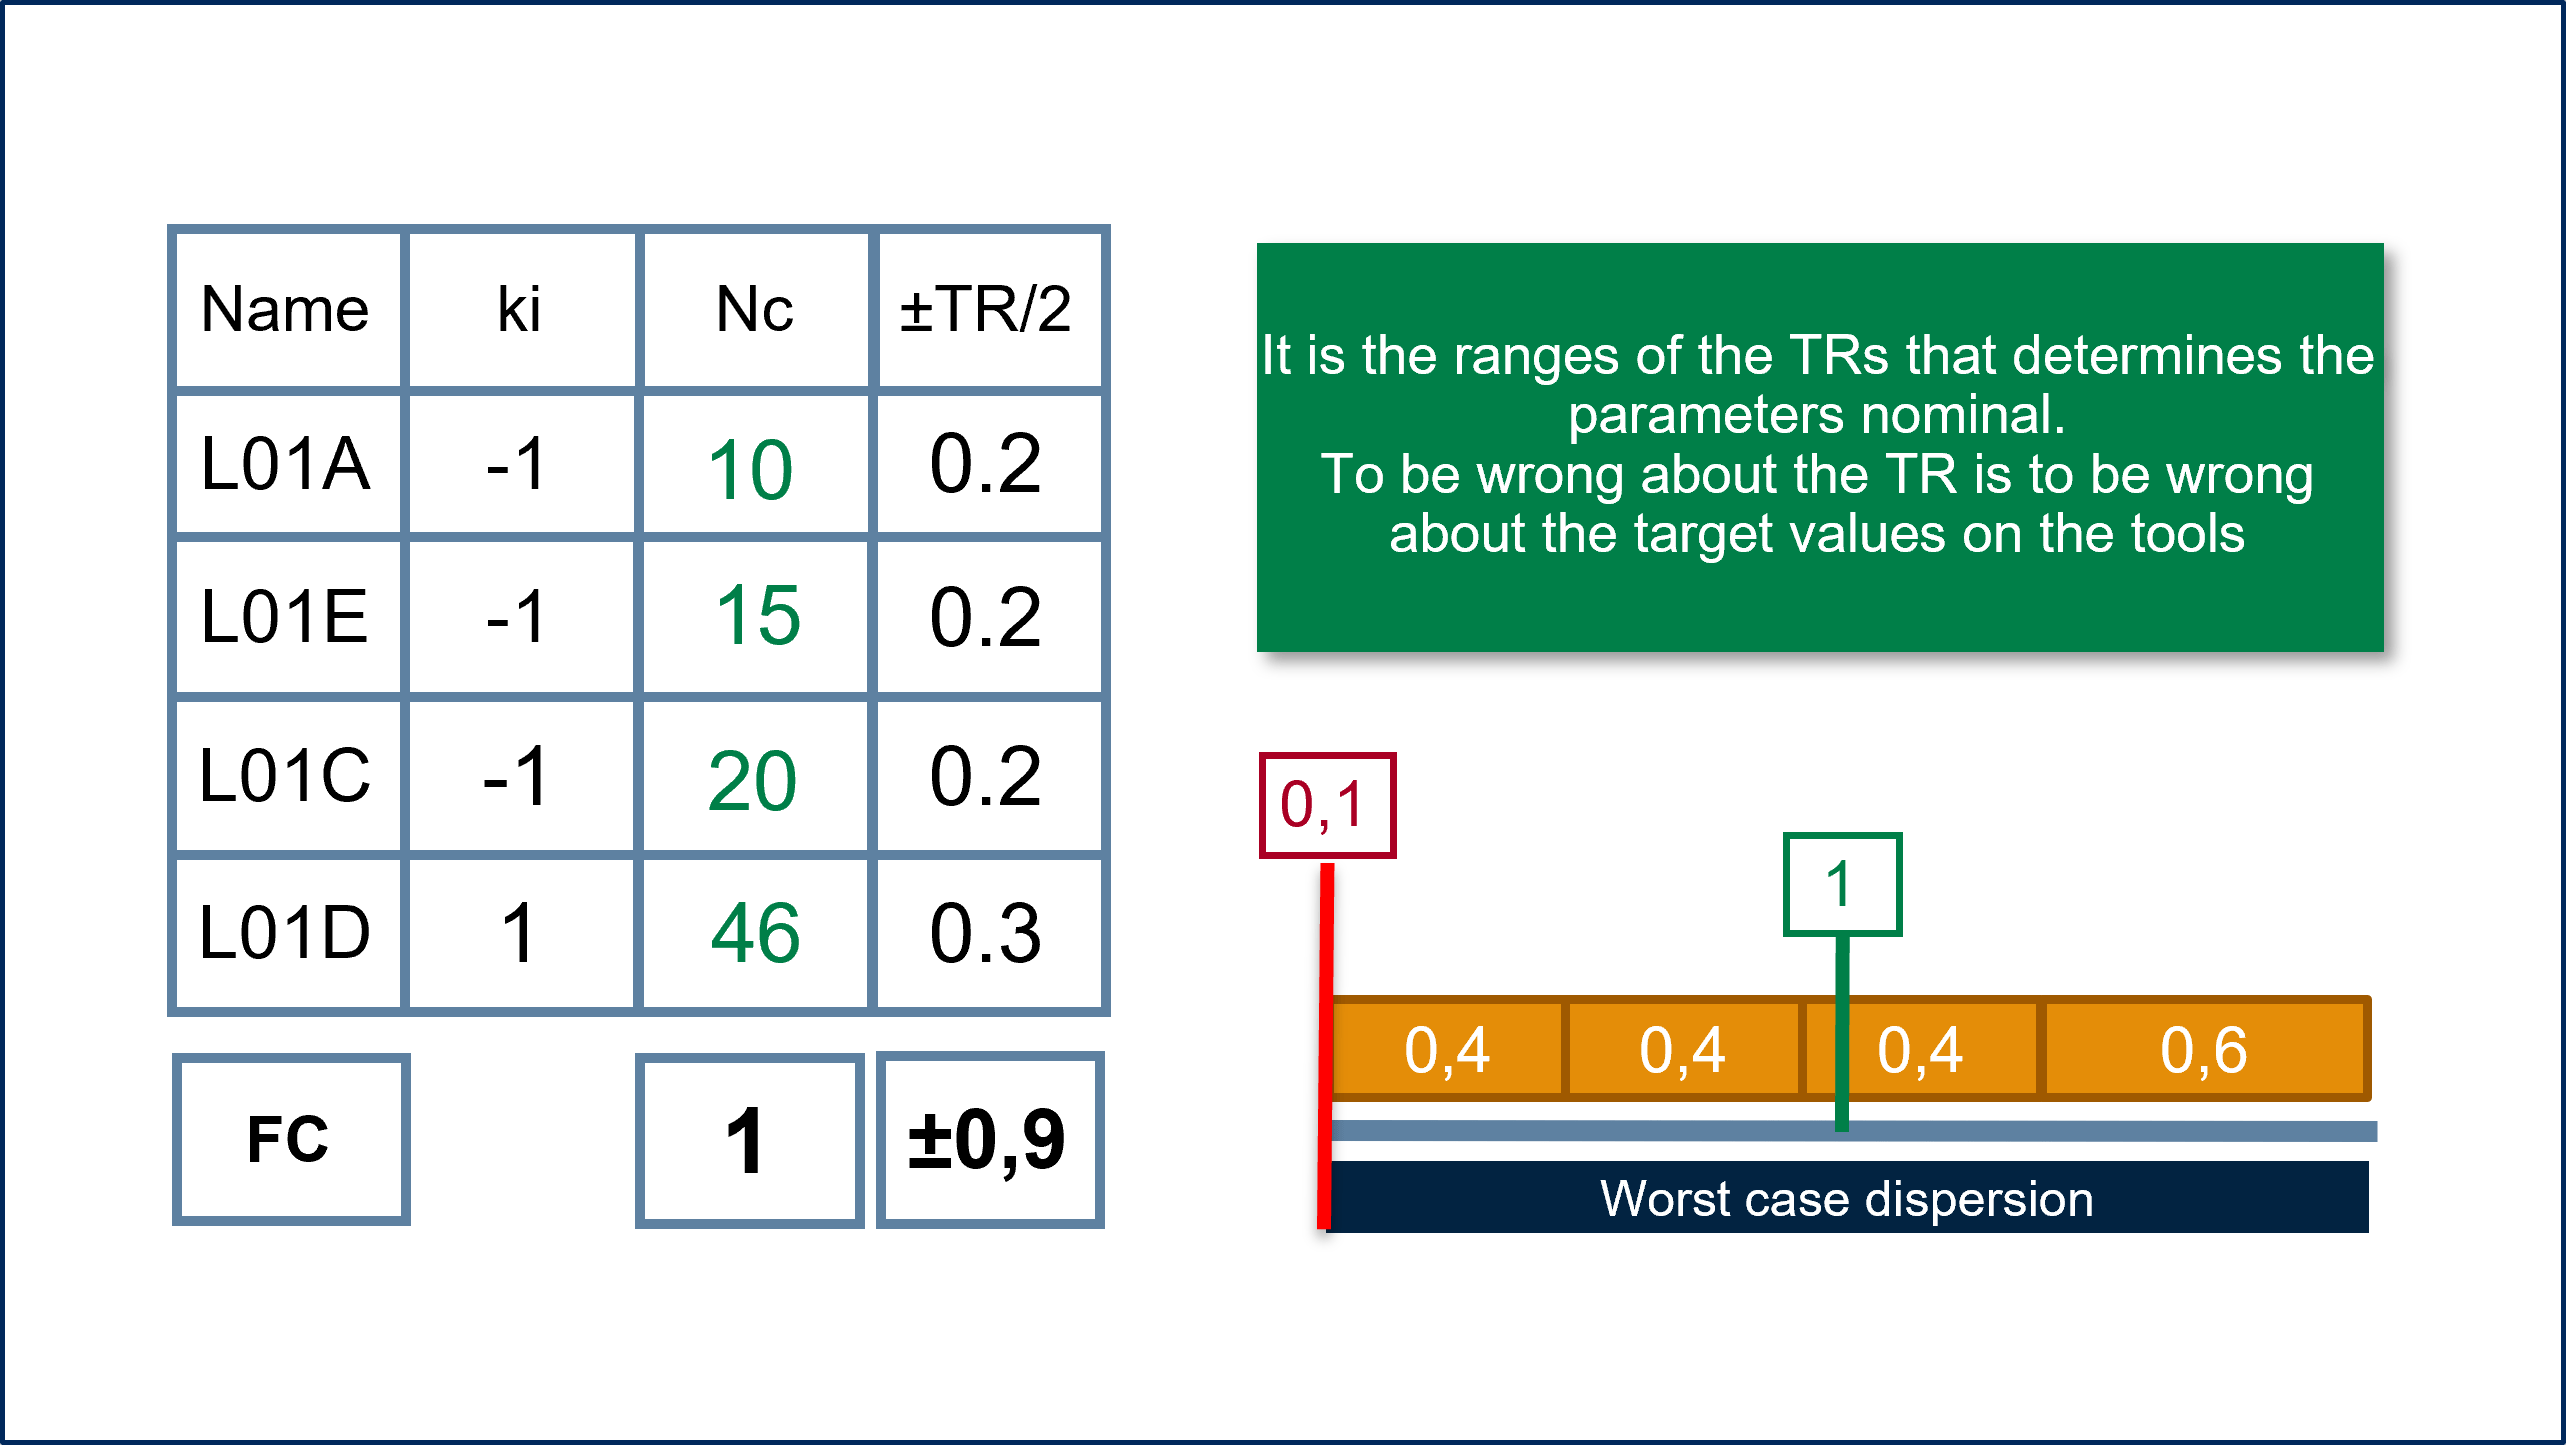
Then you can solve the nominal equation in order to know the centered nominal of each component.
This nominal value becomes the target of the tool, the production, a DFSS action which will be beneficial because the target is known.
Remember that it is the range of the TRs that determines the nominal of the dimensions. As soon as we are wrong about the TR, we are wrong about the target values of the tools.
And the implications of this error will be strong:
- Significant risk of successive modifications,
- More risks of non-conformities in production,
- Generation of additional cost not taken into account in the part price,
- Increase in delays.
We understand, thanks to this simple example, that the tolerance interval and the capabilities of your production tools are at the centre of the process of developing a high-performance and reliable product.
To provide guarantees of cost/time feasibility, this method will have to be applied to complex systems, involving numerous functional requirements, sometimes contradictory, which interact and collide, pressed by time to market and profitability requirements. The response to this challenge will involve the application of a statistical and coherent policy between the design office, the industrialization, tooling and production departments.
Would you like to know more or call on our design expertise to apply this approach to your products? Do not hesitate and contact us.


